Showing posts with label Sewing. Show all posts

Monday, February 20, 2012

Baby dresses!

I am forever seeing so many cute baby dresses to sew on sites like Pinterest. I decided I better take the plunge and try sewing a baby dress for my own little girl.

My first try was the easy Pillowcase Dress from Prudent Baby.

Pillowcase dress

It was really was as easy as they said and I think it came out great! I will definitely making more of these. I added a contrasting binding instead of ric rac to the Freshcuts fabric I used and I love how it sets off the flower print.

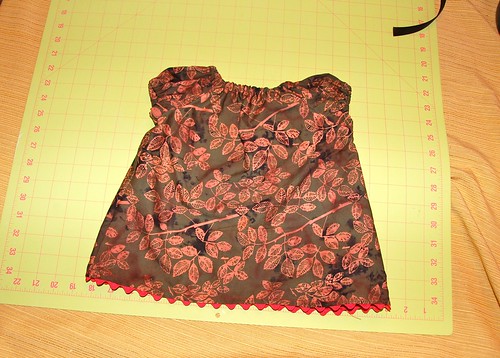
My next attempt the Infant Peasant Dress from Sew Much Ado.


Peasant dress

Amelia is wearing a 6-9 month size and the pattern was for a 0-3 month size - so I attempted to also make the pattern larger to fit her. I managed to succeed in making it larger but I will definitely make it a bit longer next time. It's more like a shirt than a dress - but still cute!

Infant peasant dress

This was much harder than the pillowcase dress for this novice dressmaker. I definitely see a serger in my future one of these days if I continue to sew clothes! Having to run a zig zag seam over all the edges definitely got old :) I also had to install elastic and ric rac for the first time. Definitely a learning experience and I will try again now that I know where I went wrong. I only had to rip out the sleeves three times :)

Amelia seems to like it thought - which makes it all worth it!

Tuesday, January 03, 2012

Burp cloth tutorial

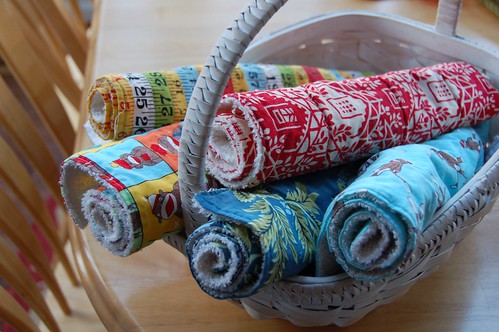
Happy new year everyone! I hope you all had a great start to 2012! I thought I'd share a sewing pattern that I whipped up for burp cloths. With a new baby in the house, you can never have enough of these! And, they make great gifts for new moms.

This is a wondering first sewing project for beginners because it's all straight lines.


Materials Needed to make 2 burp cloths:
- 1/2 yard of quilting cotton
- 1/2 yard of terry cloth
- Sewing thread to match fabric
- Rotary cutter
- Cutting mat
- Scissors
- Straight pins
- Iron

Directions:

1. Cut out your fabrics using your rotary cutter and cutting mat – I cut 2 pieces 14 x 22 inches. I tend to cut out pieces two at a time to save time. If you fold your fabric in half you can get two pieces easily by cutting off the fold.


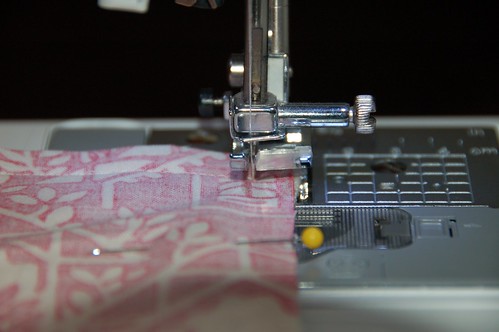
2. After cutting out your fabric – put one piece of cotton and one of terry cloth on top of each other with right sides facing. Pin around the outside to make sure it doesn’t move while you sew.


You are going to turn your sandwich inside out when you are done, so you have to leave about a 2 inch hole in order to do this. I like to put a green and red pin at the start and end of this hole so I know where I am. (sometimes I get carried away and forget to stop sewing at the hole! The red pin helps prevents this.)


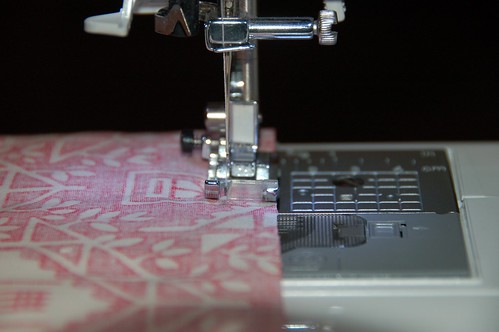
3. Using your machine’s foot as a guide for the seam allowance, position your fabric on the machine so your foot is even with the edge. Start sewing at your green pin, but remember to remove the pins before you sew over them so you don't break a needle.


4. When you get to a corner, stop sewing with the needle in the fabric, lift the presser foot and rotate your fabric 90 degrees and put the presser foot back down. Continue sewing on the next side. This helps give you neat right angles at the corners.


5. Continue all the way around until you get to the red needle. At the red needle stop sewing and backstich a few stitches for extra strength since you will be turning your fabric at this point and putting extra stress on those stitches.


You are left with a two inch opening.

6. Clip the corners of your burp cloth to remove extra bulk.


7. Turn your cloth inside out.


8. Find the hole you left and turn the ends of the open fabric under to make a neat seam and pin closed.


9. Iron your cloth to remove any bumps.

10. Starting at one end of your hole, make a top stitch as close to the edge as you feel comfortable and stitch all the way around. Don’t forget to make your neat right angle corners by lifting the presser foot and turning your fabric before starting the next side.


11. Once you are finished with the top stitching, I like to add a few rows of quilting to the top. I ran 3 straight lines down the length of my cloth. This helps the cloth keep it’s shape. You could even get fancy and add some decorative quilting!


12. Trim all your loose threads and you are done! Go find a drooling baby to mop up!


This pattern is for personal use only.

Wednesday, November 18, 2009

We're off to see the wizard...

The wonderful Wizard of Oz!

Sunday was Jolene's birthday and as a special treat I took her and her girls to see the Wizard of Oz at the Lyric in Baltimore.

It was a great show and the girls loved every minute of it - as did I.


wizard of oz


It was fun to keep the treat a secret from the girls. They had no idea where we were going! I couldn't resist making these bags for them and even when they opened them they still couldn't guess...

I made each girl a tote bag with this awesome Wizard of Oz fabric from the Seminole Sampler.

wizard of oz bags

wizard of oz bags


And I made Jolene a little wallet from the Ruby slippers fabric.

Ruby slippers wallet

Tuesday, September 22, 2009

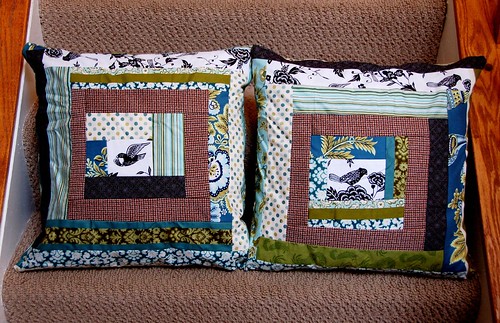
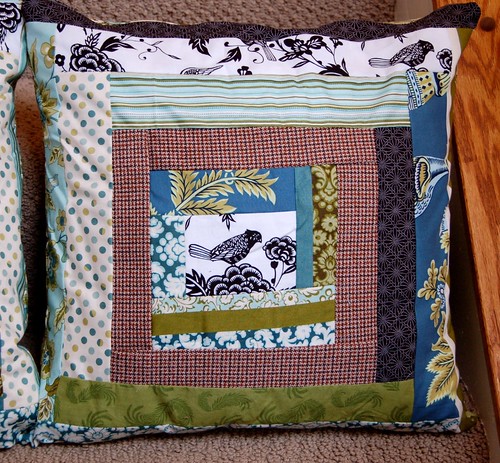
Log cabin pillows

I sewed some log cabin scrappy pillows a few weeks ago using some stash fabric and some fabric from one of my grandmother's outfits. My grandmother loved to wear these 60s style polyester pant suits. One of her favorites was this brown houndstooth number. I can still see her in it!

My mom was going to donate all of her clothes but I asked for that outfit. I decided to make some pillows that incorporated some of the fabric from this outfit as a way to keep her memory close.

I made one for my mom and one for me.

Scrappy pillows

Scrappy pillow

Scrappy pillow

I love how it came out! These are a wonderful quick stash buster project. I may have to make some more of these pillows as gifts - minus the polyester pants suit strips of course!!

Tuesday, December 09, 2008

Playing Catchup

I haven't blogged in a while and man do I have a lot to share! This will be my catch-up post.

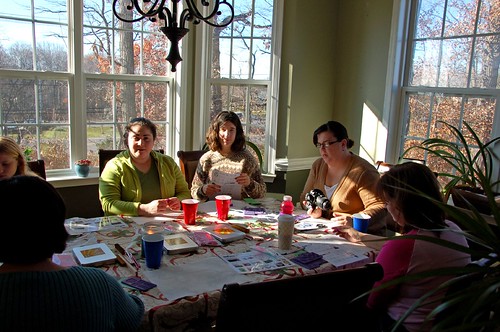
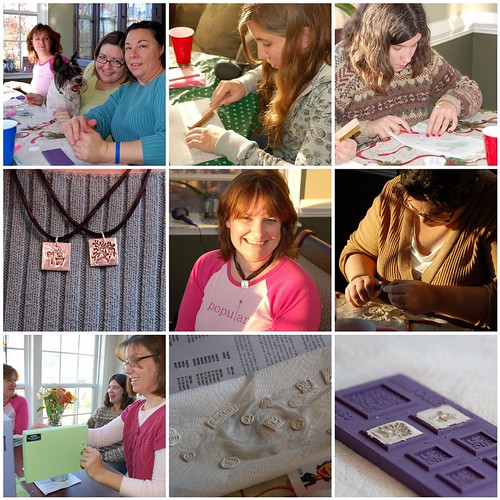
Two weekends ago I had a bunch of friends over to make Lilly Ollo jewelry. There is a paint your own pottery place near my house - The Pottery Stop - that also does Lilly Ollo silver jewelry. I was interested in trying it - so I called the shop and found out that I could have a party at my house if I got 6 or more people to attend! Yay! So I did.

We had a blast!

The gang

We were able to pick out a design, press our silver clay into the mold, fire it in the kiln, then burnish it and pick out a necklace.

Lilly Ollo Silver Jewelry Mosaic

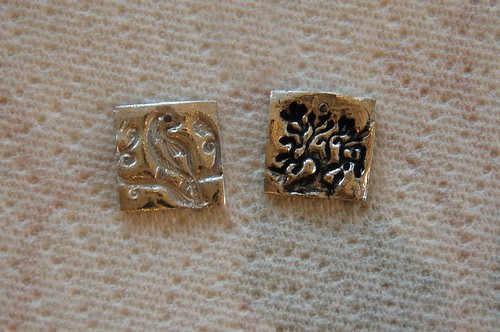
Here are my two creations... I finished the tree with a black coating and left the bird plain silver. I love how they came out! I definitely want to try that again.

My pendants

Moving on to this past weekend - some of my knitting friends and I have a yearly Handmade Holiday Swap where we each get assigned a person to make a present for and then swap at a tea party.

We all loved our presents! I can't wait to show you the amazing tatted ornaments I got from Jen - I just need to take a picture! I was speechless!

Handmade Holiday Swap

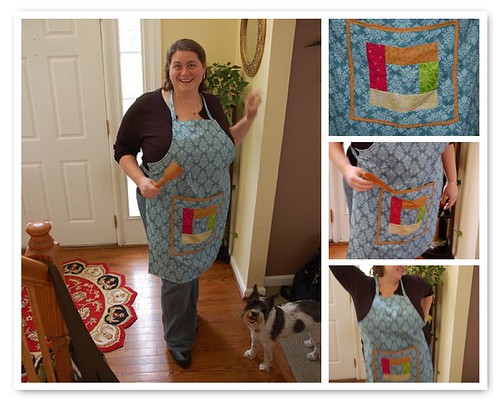
Sarah was down for the weekend too and I gave her her Christmas gift a bit early since she was here in person. I made her an apron!

Sarah's apron

I know Sarah loves to cook and thought she would enjoy an apron to use in the kitchen. She told me today she plans to wear it to spinning to help keep the fiber off of her clothes! What an awesome idea!

Jody and Sarah

Miss you already Sarah!!

Phew - all caught up.... almost.

Stay tuned...tomorrow - a new free pattern!

Saturday, October 25, 2008

Baby Love

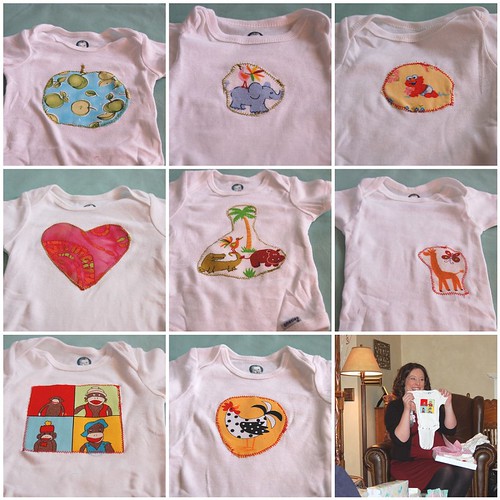
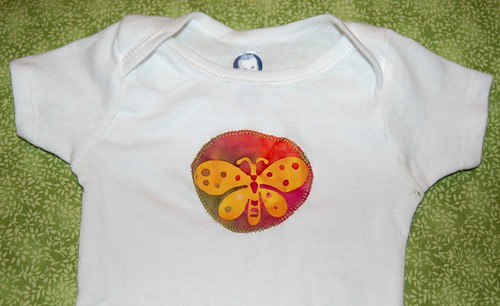
I whipped up a few baby onsies for my friend Lisa's baby shower this weekend...

Lisa's baby shower onsies

There were definitely a hit! I highly recommend making these for a quick and inexpensive handmade gift!

All you need is:
- Onesies
- Cute baby appropriate fabric
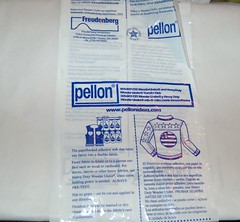
- Iron-on tear away stabalizer like Pellon Wonder Under Fusible Web

Oct 08 003

Directions:
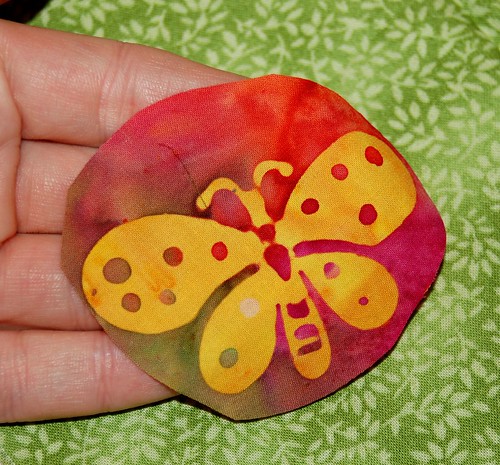
1. Cut out your fabric

Oct 08 002


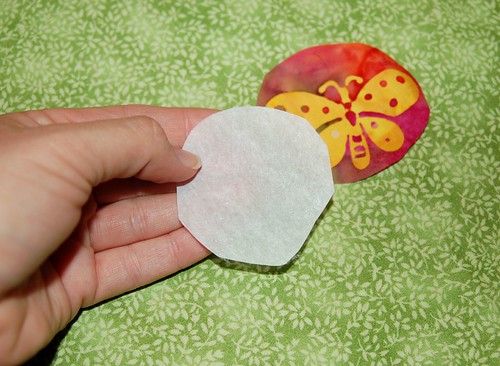
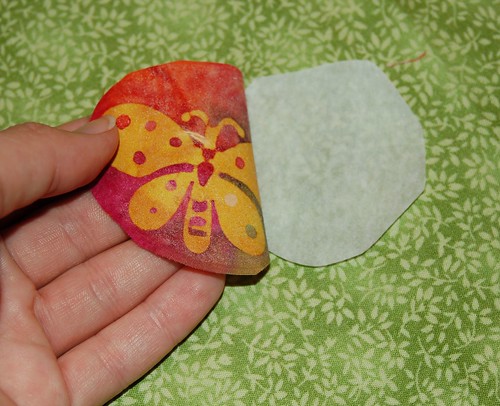
2. Cut out your stabilizer to the same shape as your fabric. I usually cut this a bit smaller than the fabric - otherwise the sticky stuff will get on your iron... ask me how I know this :)

Oct 08 004

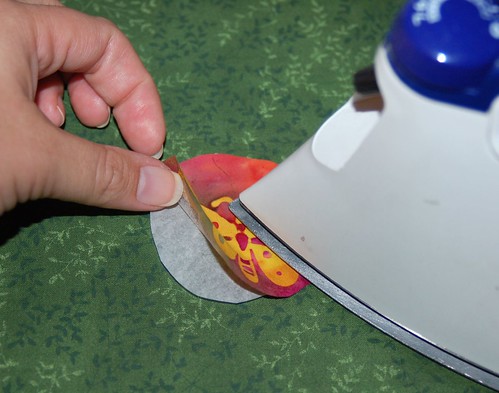
3. With the paper side of stabilizer down and fusible side up - place your fabric face up and iron them together.

Oct 08 007

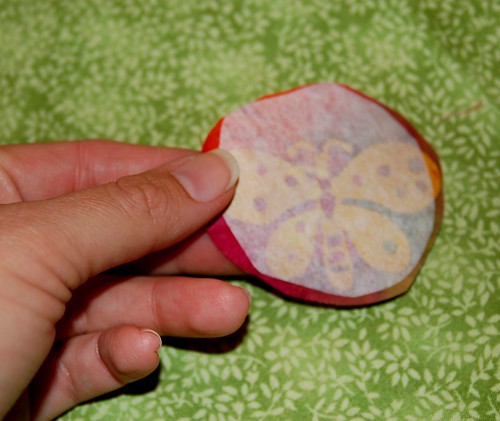
4. Peel off the paper backing - leaving the sticky fusible part attached to your fabric.

Oct 08 008

Oct 08 009

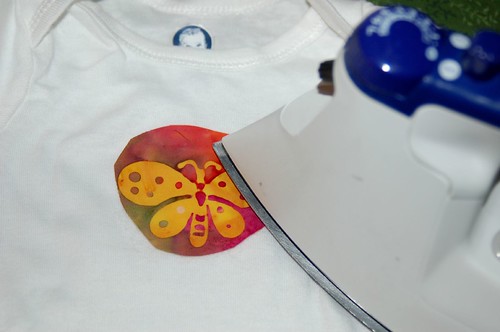
5. Place the fabric with the sticky stablizer on the onsie and iron it down. This helps keep the fabric from shifting when you sew on the decorative border.

Oct 08 010

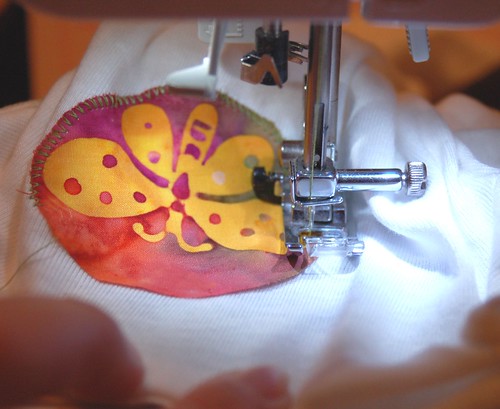
6. Pick a complimentory thread, and using a zigzag stitch, sew around the border of the fabric. Make sure you catch at least one side of the zigzag stitch in the fabric. Be careful to sew only on the front of the onsie! (It's easy to accidentally catch the other side!)

Oct 08 015


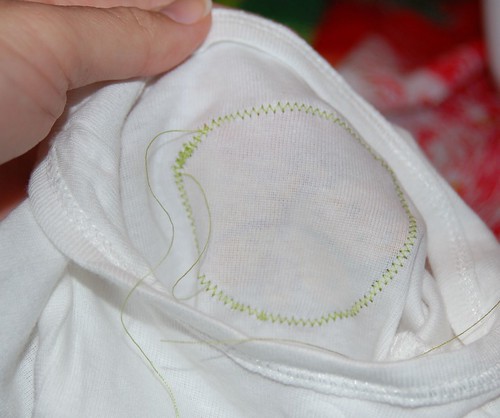
7. Once you make it all the way around, backstitch for a few stitches to secure and then trim the excess thread on the inside and outside of the onsie.

Oct 08 016

And you're done!

Oct 08 018

I'm sure a baby near you will love their new outfit!!

Tuesday, October 07, 2008

Baby Quilt

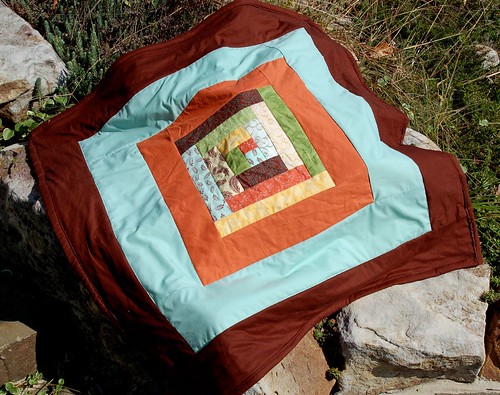
I made a baby quilt for my friend Theresa's new baby boy Henry. A while back I bought a fat quarters kit with these awesome orange and blue and green fabrics. I loved the colors and knew it had to be mine.

I just started with a basic log cabin design using some of the fat quarters and my inspiration took flight from there! I headed out for some solid colors to tone it down and make it more "boy appropriate".

I am thrilled with the results!

Henry's Quilt


Henry's Quilt Detail


I finished it just in time for my visit with Theresa on Sunday. We had a lovely visit and she even made cake! Yum! I was a spoiled guest :)

Here is Theresa and Henry looking lovely in their sunroom...

Theresa and Henry

I don't know about you - but I think Henry loves his new quilt!

Henry on his new Quilt

Saturday, August 30, 2008

I made clothes!

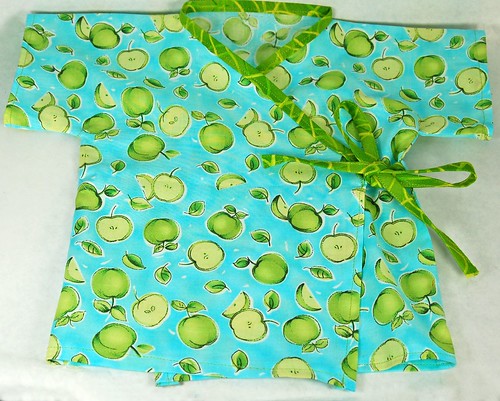
I did it! I sewed my first item of clothing. No, not for me - but for a friend of mine's new baby girl.

I made this cute kimono!

Baby Kimono

I used this tutorial:

Simple Kimono Wrap (version 2)

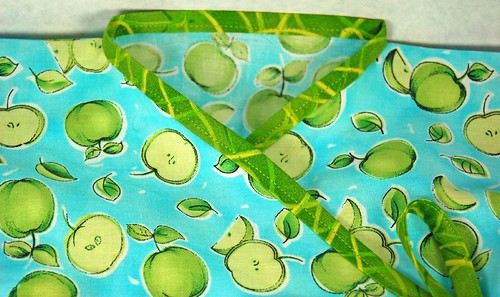
It was the first time I've ever done a binding like this and I have to say it wasn't that bad!


I have this cool little bias binding maker thingy that I never used - but now I have! It was really a lot easier than I thought. You just cut your fabric into strips twice as wide as the desired end result - pop the strip into the bias maker and iron it flat as it comes out! And you end up with perfect bias strips!
Love it!


Kimono closeup

I think I may have to make some more!

Friday, February 29, 2008

Wristlet Tutorial

Happy Leap Day everyone! In honor of this day - I decided to post another sewing tutorial.

This time it's for my Wristlet pattern.

Remember these?

Wristlets

Well, now you can make one too!

Materials:
- Less than a quarter yard of linen,
- Scraps of quilting cotton in two patterns (one for the lining and one for the outside accent fabric)
- Less than a quarter yard of medium weight fusible interfacing
- Thread to match
- Cutting mat, ruler and rotary cutter
- Zipper (7 inches or larger)
- Pins and other sewing tools


Directions:

Step 1: Select and cut your fabric. I used linen for the body and strap, but you could use anything. Cut out the pieces:
-From the linen:
- Cut 2 pieces that measure 8'' by 6''
- Cut a piece for the strap that measures 22'' by 3.5''
- Cut 1 piece of cotton fabric for your outside accent piece that measures 8'' by 6''
- Cut 2 pieces of Cotton fabric for the inside lining that measure 8'' by 6''
- Cut 2 pieces of interfacing that measure 8'' by 6''

Step 2: Iron the interfacing to the inside lining pieces.

Step 3: Cut one of the inside lining pieces, the outside accent fabric and one of the linen pieces to create the opening for the zipper. Determine where you want the zipper to go - it can be anywhere. I cut my pieces 2'' from the top. (Leave at least an inch and a half on top for the seam and handle)
After cutting your pieces - your fabric should look like this:

wristlet tut  04

Step 4: Pin fabrics to zipper.

Starting with the pieces that will end up below the zipper, pin the inside lining and outside accent fabric pieces to zipper. Make sure to put the outside accent fabric "right side to right side" with the zipper. (The front of the zipper should go against the right side of your outside accent fabric and the back of the zipper should be up against the right side of the inside fabric.)

You are basically making a sandwich with the zipper on the inside:
Like this:

wristlet tut  05

Pin in place, making sure to only pin through the top half of the zipper - otherwise it will make it harder to open and close the zipper if you pin through both sides (more on this later).
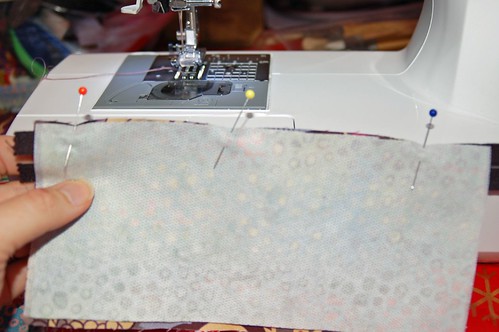
wristlet tut  06

After pinning the fabric to the zipper, open the zipper about halfway before you start sewing.

Tip: The reason I open the zipper before I start to sew, is because if you leave the zipper closed, it is harder to sew next to the zipper pull. You will close the zipper after sewing halfway across.

wristlet tut  08

Step 5: Start to sew the zipper to the bottom inside and outside fabrics. Use a zipper foot, or about a quarter inch seam allowance. Stop before you get to the zipper pull.

wristlet tut  09

When you reach the zipper pull, make sure your needle is in the down position (in the fabric) and then raise the pressure foot. Turn your work so you can see where you are, and close the zipper. Now the zipper pull won't be in your way anymore, and you finish sewing across the piece.

wristlet tut  10

Step 6: Press.

After sewing across the piece, iron the piece so the fabrics on both sides lay flat against the zipper.
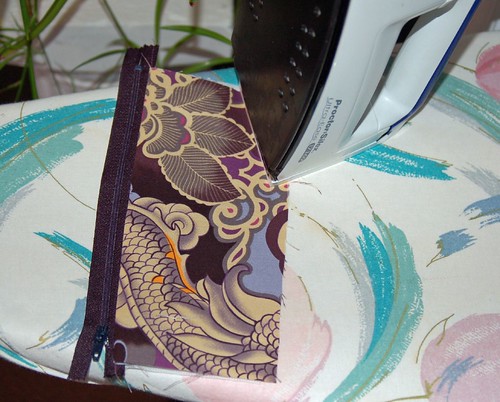
wristlet tut  11

Step 7: Pin the top pieces to the zipper.

Again, make sure to put the right side of the zipper face to face with the right side of the outside accent fabric and the back of the zipper face to face with the right side of the lining fabric. Pin in place
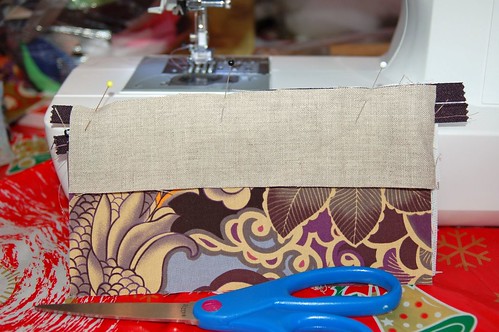
wristlet tut  12

Your zipper sandwich should look like this.
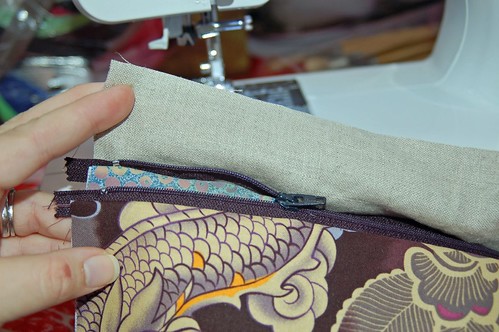
wristlet tut  13

Open the zipper about halfway again so you can sew more easily and not have the zipper pull in the way.

Step 8: Start to sew the zipper to the top fabrics using a zipper foot or a quarter inch seam allowance.

wristlet tut  14

After sewing halfway across, make sure the needle is in the down position, raise the pressure foot, and close the zipper just as you did in step 5.

Step 9: Press.

Make sure both the top and bottom lay flat when the zipper is closed.

wristlet tut  16


Step 10: Top stitch.

Sew across the top and bottom of your zipper using a quarter inch or an eight of an inch seam allowance.

Tip: It helps to use foot of your machine as a guide. Make sure to line up the foot to the edge of your fabric for a straight clean top stitch.

wristlet tut  18


Step 11: Add your own label (if desired).

Now is the time to add any labels or logos you want to be on your wristlet. Sew around the edge (getting as close as possible to the edge while still catching the label) making sure to leave the needle down when turning the corners.

wristlet tut  20

Step 12: Prepare the handle.

Fold your fabric in half legnthwise and press a middle seam. Then open the handle, and fold the two halfs into the middle seam and press again. Finally, fold the handle in half (after folding and ironing the outside edges into the middle) and press. This will create a sturdy and neat handle with all the raw edges folded into the inside.

wristlet tut  21

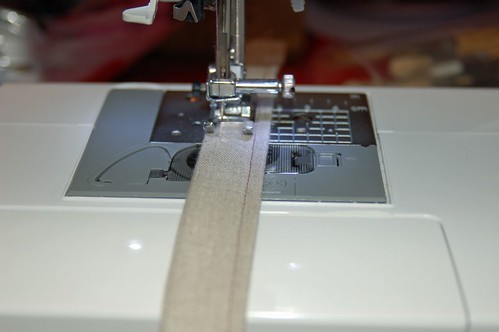
Step 13: Pin handle and sew two border seams.

Using your pressure foot as a guide, sew the legnth of the handle with a quarter inch or an eight of an inch seam allowance on both sides of the handle.
wristlet tut  22

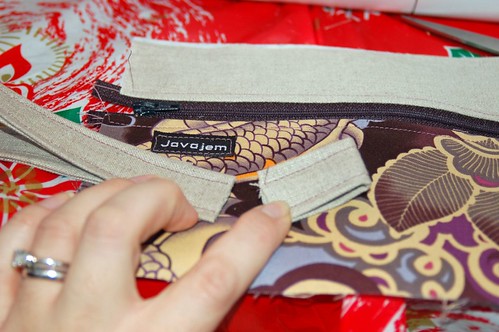
Step 14: Cut about a two inch piece from the end of your handle. This will act as a pull to assist in the opening and closing of the zipper.

wristlet tut  23

You should now have two pieces - one long piece for the handle and one small piece for the pull:
wristlet tut  24

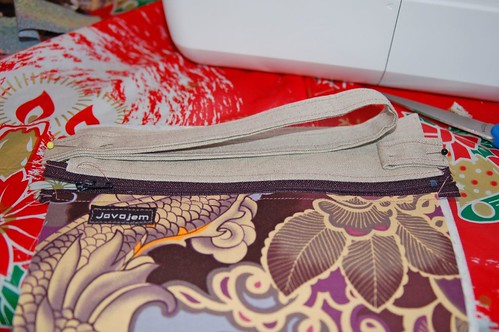
Step 15: Fold the handle and pull pieces in half and pin them to your fabric above the zipper.

Make sure the handle and pull are on the inside (you are about to make another fabric sandwich)
wristlet tut  25

Step 16: Make the fabric sandwich.

Layer your pieces as follows:
- The bottom layer should be your fabric with the zipper - right side up.
- Next, add the linen right side down (or the piece of fabric that you want to be the back of the outside of your wristlet)
- The last layer is the lining fabric right side up.

wristlet tut  26

Check to make sure your handle is in the inside of this sandwich.

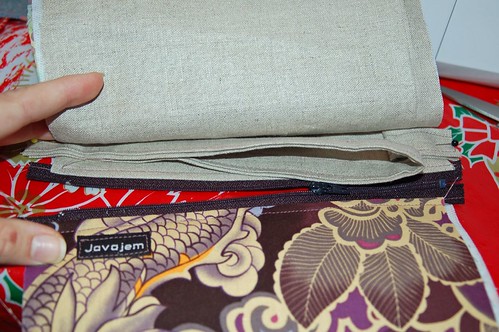
Step 17: Open the zipper - otherwise you will have a hard time opening the finished piece after you have sewn all the sides.
wristlet tut  27

Step 18: Pin the pieces together.

wristlet tut  28

Step 19: Sew all around the outside.

To reinforce the handle and the pull, sew backwards and forwards over them a few times for extra strength. Be careful when sewing over the zipper, and when sewing over the handle. The fabric is very thick! Go slowly!

wristlet tut  29

Tip: For neat corners, remember to turn your work with the needle in the down position.
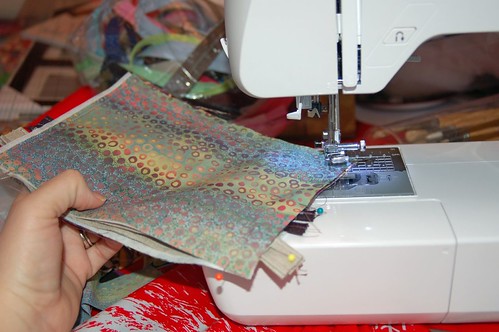
wristlet tut  30

Tip: To make sure you don't accidentally sew through your handle, you can pull it through the zipper opening.

wristlet tut  31

Step 20: Trim the corners.

When you are finished sewing, trim the excess fabric from the corners and the outside edges, being careful not to cut through your seams.

wristlet tut  33jpg


Step 21: Turn your wristlet right side out through the zipper.

Iron one more time to press out any bulk.

wristlet tut  34

Step 22: Enjoy your new wristlet!

wristlet tut  35

I hope you try to make one too - and definitely write and let me know if you make one. I'd love to see the finished product!

Have a great weekend!

** Updated**
Many people have asked where I got the labels.  I got them from namemaker.com