
One of her other favorite things to play with is an empty wipes bag. She loves the crinkly sound it makes and it keeps her busy and entertained while I'm trying to change her diaper.
So with this in mind - I decided to create a blanket that had all of her favorite things!
A tag blanket with a crinkly inside!

It was fairly easy after all the pinning! Here is what I did:
Tag Blanket Tutorial:
Supplies:
- Fat quarters of 2 different fabrics
- Decorations (Ribbons, tags, fabric, hair ties etc.)
- Notions: Pins, Sewing thread
- One empty bag of wipes
1. Cut out your fabrics to your desired size. Mine were about 14 inches square.

2. Grab your empty wipes container,
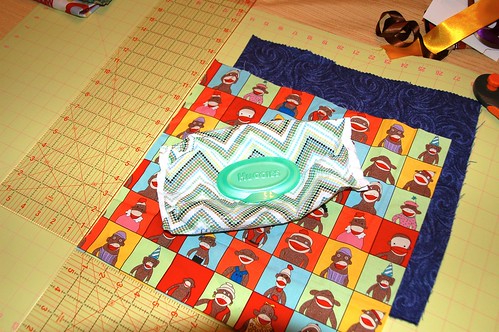
and remove the plastic bits and open it up

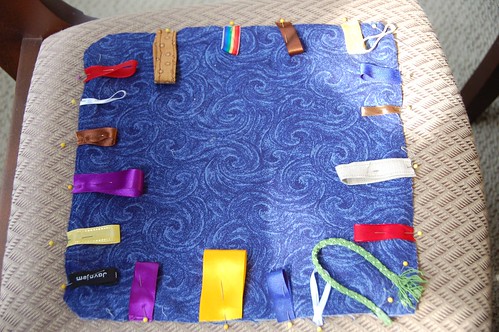
3. Grab your ribbons stash... you can also use fabric, hair ties or anything at all that may be fun to chew for your baby.

4. Cut your ribbon to the desired size, and start pinning them to the right side of one of your fabrics. Make sure the ribbon loops are laying toward the inside with the ends on the end of your fabric.
5. Put your second fabric on top of your ribbons right side down, and add the wipes package on top of that. So - the layers of your "sandwich" will be: fabric one, right side up with ribbons pinned on, second fabric right side down, and finally the wipes package on top.
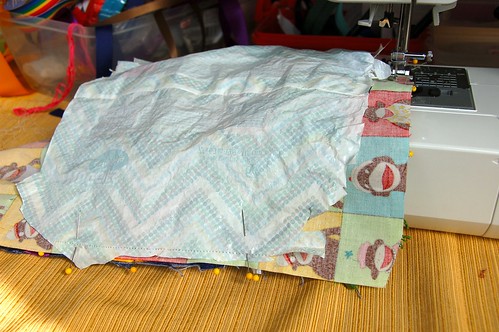
6. Bring everything to your sewing machine and sew around leaving a hole about 3 inches wide. Make sure to remove the pins as you go. To make neat corners, stop sewing at the corner and lift your pressure foot, turn your fabric 90 degrees and then replace your pressure foot and keep on sewing. BE SURE TO LEAVE A GAP SO YOU CAN TURN YOUR PIECE RIGHT SIDE OUT.
7. Trim your corners and any excess fabric and then turn your piece right side out through the hole you left in step 6.
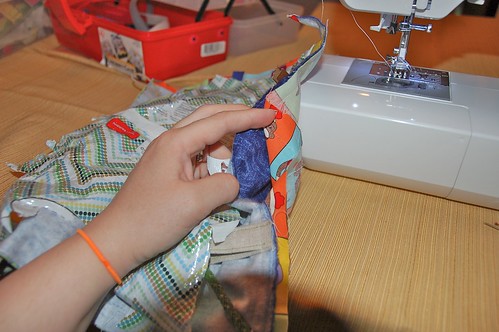
8. Fold the raw edges to the inside and re-pin any ribbons that were in the hole you left.

9. Top stitch all the way around to close the hole and you're done!
Hopefully it will keep your baby happy and entertained.
Good luck!!
5 comments:
How cute!! I'm sure your little one loves it, and I have a grandson who may just get one before too long....if I can just grab the time!
That came out great! I wish I could sew....
Forgive me, but I'm a bit confused on your measurements...
You need two fabrics at less than 1/4 yd of fabric. 1/4 yd of fabric measures typically 9x44/45 inches. But you cut your fabric at 14x14 in sq. Did you meant o put less than a half yard of fabric?
@littlewillowtree - Sorry I didn't write back sooner. I meant to write 2 fat quarters. Sorry for the confusion!
What is the wipes container for? Is it just that the plastic makes a noise?
Post a Comment